Introduction to Spring Data Redis
Overview
This article is an introduction to Spring Data Redis, which provides the abstractions of the Spring Data platform to Redis – the popular in-memory data structure store. Redis is driven by a keystore-based data structure to persist data and can be used as a database, cache, message broker, etc.
Creating The Project
Let's crate a project with spring-boot-cli. If you are not familiar with spring-cli,
it's pretty handy tool to have. You can install it from this
link
.

You can type the following command in your terminal.
spring init --dependencies=lombok,data-redis,web --package=com.techyowls --build=gradle spring-data-redis
Alternatively, You can generate the project from Spring Initializr web tool by following the instructions below -
- Go to http://start.spring.io
- Project -> Gradle Project
- Language -> Java
- Enter Artifact as “spring-data-redis”
- Change Package Name to “com.techyowls” / or anything you like
- Select Web, JPA and Spring Data Redis (Access + Driver) dependencies.
- Click Generate Project to download the project.
Our generate Folder Structure will be like following screenshot.
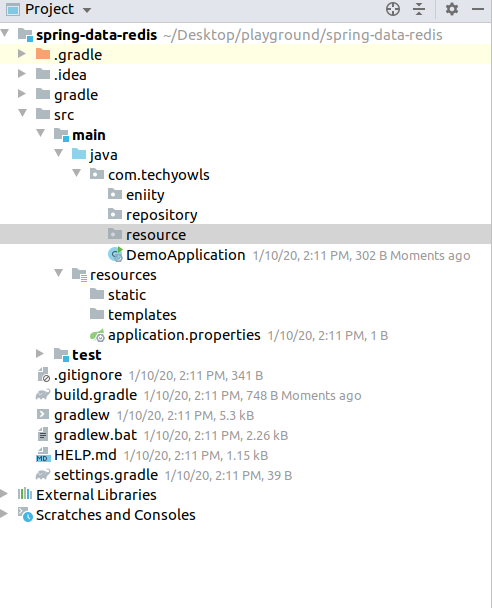
So let's create entity, repository and resource packages inside of /src/main/java
Running Redis Using Docker-Compose
We will run a Redis standalone instance locally using docker-compose. Our docker-compose.yaml looks like this.
version: '3.7'
services:
  redis:
    image: redis:6.0-rc1-alpine
    networks:
      - redis-net
    ports:
      - "6379:6379"
    entrypoint: redis-server --appendonly yes
    volumes:
      - redis-data:/data
    restart: always
networks:
  redis-net:

volumes:
  redis-data:
To start redis-server:
docker-compose up
The Redis Configuration
To establish the connection between the application and Redis server instance, wee need to use a Redis Client.
There are a number of Redis Client implementations available for Java. This this tutorial we will use Lettuce . So how the Lettuce dependency is being managed if we take a look at our build.gradle
plugins {
    id 'org.springframework.boot' version '2.2.2.RELEASE'
    id 'io.spring.dependency-management' version '1.0.8.RELEASE'
    id 'java'
}

group = 'redis-spring-data-redis'
version = '0.0.1-SNAPSHOT'
sourceCompatibility = '1.8'

configurations {
    compileOnly {
        extendsFrom annotationProcessor
    }
}

repositories {
    mavenCentral()
}

dependencies {
    implementation 'org.springframework.boot:spring-boot-starter-data-redis'
    implementation 'org.springframework.boot:spring-boot-starter-web'
    compileOnly 'org.projectlombok:lombok'
    annotationProcessor 'org.projectlombok:lombok'
    testImplementation('org.springframework.boot:spring-boot-starter-test') {
        exclude group: 'org.junit.vintage', module: 'junit-vintage-engine'
    }
}

test {
    useJUnitPlatform()
}
org.springframework.boot:spring-boot-starter-data-redis is taking care of that.
@Configuration
@EnableRedisRepositories
class RedisConfiguration {
    @Bean
    public LettuceConnectionFactory lettuceConnectionFactory() {

        return new LettuceConnectionFactory();
    }

    @Bean
    public RedisTemplate<?, ?> redisTemplate() {
        RedisTemplate<byte[], byte[]> template = new RedisTemplate<>();
        template.setConnectionFactory(lettuceConnectionFactory());
        return template;
    }
}
The configuration is quite simple.
- Using the Lettuce client, we're defining a connectionFactory.
- RedisTemplate using the lettuceConnectionFactory. This can be used for querying data with a custom repository.
- @Configuration annotation is spring-boot specific.
- @EnableRedisRepositories annotation is to activate Redis repositories.
Custom Connection Properties:
You may have already noticed that the usual connection-related properties are missing in the above configuration. For example, the server address and port are missing in the configuration. The reason is simple: for our example, we're using the defaults. However, if we need to configure the connection details, we can always modify the LettuceConnectionFactory configuration as follows:
LettuceConnectionFactory constructor takes an instance of RedisStandaloneConfiguration and we can set our configuration in that object.
   @Bean
    public LettuceConnectionFactory lettuceConnectionFactory() {
        RedisStandaloneConfiguration redisStandaloneConfiguration = new RedisStandaloneConfiguration();
        redisStandaloneConfiguration.setHostName("localhost");
        redisStandaloneConfiguration.setPort(6379);
        return new LettuceConnectionFactory(redisStandaloneConfiguration);
    }
Entity
Let's use a User Entity for our example:
@RedisHash("user")
@AllArgsConstructor
@NoArgsConstructor
@Builder
@Getter
public class User {
    @Id
    private Long id;
    @Indexed
    private String firstName;
    private String lastName;
    private Integer age;
}
@RedisHash marks Objects as aggregate roots to be stored in a Redis hash. @RedisHash(“user”) will help during querying; as otherwise, the key generated in Redis will include the fully qualified classname.
@AllArgsConstructor, @NoArgsConstructor, @Builder, @Getter annotations are lombok specific. If you are not familiar with lombok then take a look of my lomobok post Our Development Good Friend Lombok
@Indexed is needed to query by firstName, without that, the query can only be executed using the key.
UserRepository:
@Repository
public interface UserRepository extends CrudRepository<User, Long> {
    List<User> findByFirstName(String firstName);
}
spring-data-redis creates an abstraction by hiding the inner complexity how redis stores it's value. findByFirstName(String firstName) method seems like the normal spring-data-jpa method that we would normally write.
UserResource:
@RestController
@RequiredArgsConstructor(onConstructor_ = @Autowired)
public class UserResource {
    private final UserRepository userRepository;

    @PostMapping("/user")
    public ResponseEntity<User> saveUser(
            @Valid @RequestBody User request
    ) {
        return Optional.of(request)
                .map(userRepository::save)
                .map(
                        user -> ResponseEntity
                                .created(resourceUri(user.getId()))
                                .body(user)
                )
                .orElseThrow(IllegalArgumentException::new);

    }

    @GetMapping("/user/findByFirstName/{firstName}")
    private ResponseEntity<List<User>> findByFirstName(@PathVariable("firstName") String firstName) {
        return ResponseEntity.ok().body(userRepository.findByFirstName(firstName));
    }
}
Testing In Local:
Let's use curl to test our endpoint to save an user.
curl -d '{"firstName":"Moshiour", "lastName":"Rahman"}' -H "Content-Type: application/json" -X POST http://localhost:8080/user
and hence the response will look like:
{"id":2038251604388001320,"firstName":"Moshiour","lastName":"Rahman"}
Let's save two user with same firstName and query our another end-point /user/findByFirstName/{firstName}
curl -X GET http://localhost:8080/user/findbyFirstName/moshiour
and the respone:
[
{"id":2038251604388001320,"firstName":"Moshiour","lastName":"Rahman"},
{"id":2353021852542279850,"firstName":"Moshiour","lastName":"Rahman"}
]
Conclusion:
This article tries to provide clear idea about how to implement spring-data-redis with spring-boot and i have tried to keep the use case as simple as possible to explain the details about the integration.
In your future posts we will take this knowledge one step further and will solve some complex use cases.
You can find the code for the sample project that we built in this article in my introduction-to-spring-data-redis repository on github.
Moshiour Rahman
Software Architect
My interests include enterprise software development, robotics, mobile computing and programmable matter.