Good Friend Lombok
Today lets talk about our development good friend Lombok. We love java but sometimes it fells like a bit verbose for doing simple things. When i was introduced with lombok for the first time it felt like wow.
Let's explore the power of lombok and see how it can help us in our day to day development life cycle.
Let's crate a project with spring-boot-cli. If you are not familiar with spring-cli
it's pretty handy tool to have. You can install it from this
link
.
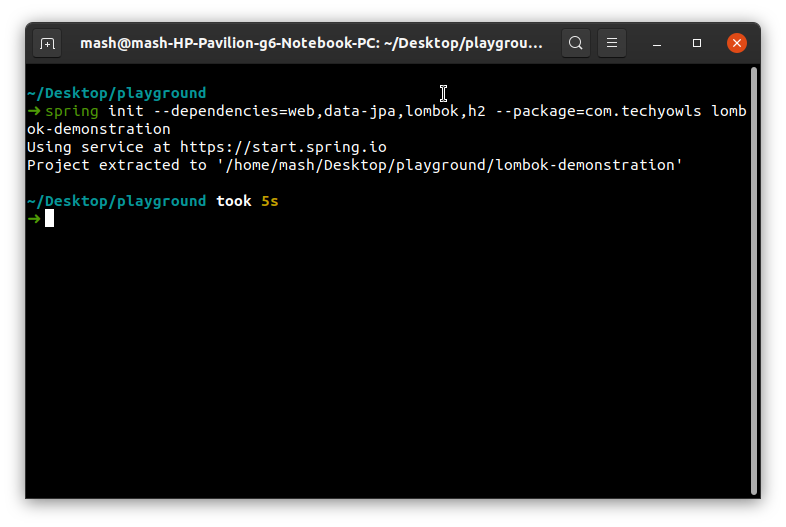
If you have installed spring-boot-cli then typing the following command will create a project named lombok-demonstration and package com.techyowls
spring init --dependencies=lombok --package=com.techyowls lombok-demonstration
for Gradle project to enable lombok we would need to do two things:
- Add the dependency
dependencies {
	compileOnly 'org.projectlombok:lombok'
	annotationProcessor 'org.projectlombok:lombok'
}
- Add configuration in build.gradle file.
configurations {
	compileOnly {
		extendsFrom annotationProcessor
	}
}
Now, lets drive deep now.
@Data Annotation
@Data
class People {
    private String name;
    private Integer age;
}
So what does @Data annotation produces?
If we look at the generated class we would see:
package com.techyowls;

class People {
    private String name;
    private Integer age;

    public People() {
    }

    public String getName() {
        return this.name;
    }

    public Integer getAge() {
        return this.age;
    }

    public void setName(final String name) {
        this.name = name;
    }

    public void setAge(final Integer age) {
        this.age = age;
    }

    public boolean equals(final Object o) {
        if (o == this) {
            return true;
        } else if (!(o instanceof People)) {
            return false;
        } else {
            People other = (People)o;
            if (!other.canEqual(this)) {
                return false;
            } else {
                Object this$name = this.getName();
                Object other$name = other.getName();
                if (this$name == null) {
                    if (other$name != null) {
                        return false;
                    }
                } else if (!this$name.equals(other$name)) {
                    return false;
                }

                Object this$age = this.getAge();
                Object other$age = other.getAge();
                if (this$age == null) {
                    if (other$age != null) {
                        return false;
                    }
                } else if (!this$age.equals(other$age)) {
                    return false;
                }

                return true;
            }
        }
    }

    protected boolean canEqual(final Object other) {
        return other instanceof People;
    }

    public int hashCode() {
        int PRIME = true;
        int result = 1;
        Object $name = this.getName();
        int result = result * 59 + ($name == null ? 43 : $name.hashCode());
        Object $age = this.getAge();
        result = result * 59 + ($age == null ? 43 : $age.hashCode());
        return result;
    }

    public String toString() {
        return "People(name=" + this.getName() + ", age=" + this.getAge() + ")";
    }
}
So simply putting @Data annotation, we have got, Getters,Setters, No Argument Constructor, toString(),hashCode(),equals(), canEqual() Which is normal requirement most of the time to have.
Lombok has individual annotations to do each of the task and can be used independently.
@Getter as name suggests produces getters of all the fields if we put that in class level. We can put that in field level as well.
@Setter it produces all the setters for each of the fields if used in class level. If used in field level then only one setter for that specific field is produced.
@ToString will generate a String using the field names and their corresponding values.
@EqualAndHashCode will generate equal and hashCode method of object equality.
@Builder Annotation
This is a amazing annotation to have and have most use case in a day to day life for a java developer.
Let's see what it produces if we put that on our People class.
@Data
@Builder
class People {
    private String name;
    private Integer age;
package com.techyowls;

class People {
    /*Getters , Setters and other methods are ignored for brevity.*/
    People(final String name, final Integer age) {
        this.name = name;
        this.age = age;
    }

    public static People.PeopleBuilder builder() {
        return new People.PeopleBuilder();
    }

    public static class PeopleBuilder {
        private String name;
        private Integer age;

        PeopleBuilder() {
        }

        public People.PeopleBuilder name(final String name) {
            this.name = name;
            return this;
        }

        public People.PeopleBuilder age(final Integer age) {
            this.age = age;
            return this;
        }

        public People build() {
            return new People(this.name, this.age);
        }

        public String toString() {
            return "People.PeopleBuilder(name=" + this.name + ", age=" + this.age + ")";
        }
    }
}
It removed previously generated public constructor and gave us a static method builder() which we can access by referring People.builder() and which produces a new instance of PeopleBuilder inner class when executed.
Then we can set the field values using .fieldName() in our case .age() or .name()
The principle of builder design pattern it returns the same instance of the object and that's why we can keep chaining method can also be called fluent api.
To break the builder pattern we need to call build() method which creates and returns the People object by using all the field values we have put.
Let's see in Action:
People people=People.builder()
        .age(21)
        .name("techy-owls")
        .build();
that is how we can use use @Builder annotation. In your day to day development a class having more than 10 fields a very common scenario and ratter than setting each field value using setters we can achieve a very elegant and fluent api to create Object and our code looks more cleaner.
@RequiredArgsConstructor Annotation
Well, this is a bit tricky but can be very useful .
Field Injection is discouraged as it makes much harder to do unit test. So, mostly we do use Constructor Injection and it's very common that a class need to use more than five or six dependencies. So the construction looks very messy and with @RequiredArgsConstructor(onConstructor_ = @Autowired) we can avoid that issue.
@Service
@RequiredArgsConstructor(onConstructor_ =@Autowired)
class SomeService{
    private final Dependency1  dependency1;
    private final Dependency2  dependency1;
    private final Dependency3  dependency1;
    private final Dependency4  dependency1;
    private final Dependency5  dependency1;
    private final Dependency6  dependency1;
}
And our good friend lombok will generate bellow class for us.
@Service
class SomeService {
    private final Dependency1 dependency1;
    private final Dependency2 dependency2;
    private final Dependency3 dependency3;
    private final Dependency4 dependency4;
    private final Dependency5 dependency5;
    private final Dependency6 dependency6;

    @Autowired
    public SomeService(final Dependency1 dependency1, final Dependency2 dependency2, final Dependency3 dependency3, final Dependency4 dependency4, final Dependency5 dependency5, final Dependency6 dependency6) {
        this.dependency1 = dependency1;
        this.dependency2 = dependency2;
        this.dependency3 = dependency3;
        this.dependency4 = dependency4;
        this.dependency5 = dependency5;
        this.dependency6 = dependency6;
    }
}
Moshiour Rahman
Software Architect
My interests include enterprise software development, robotics, mobile computing and programmable matter.